The content of the article
The aquarium is considered to be a decorative element of the interior, it will decorate even the most unremarkable room. At first glance, it might seem that installing a house does not present any particular difficulties: flooded the water, lined the ground and deal with the end. However, like any other business, preparation includes its own characteristics that must be taken into account. Consider the important aspects in order.

Stage number 1. Purchase and installation of an aquarium
- First of all, you need to purchase an aquarium that is suitable in size and size. As experienced aquarists advise, the optimal volume is considered to be a volume of 35-45 liters. In such conditions, it is easier to maintain the natural biosphere. If you live in a small apartment (one-room, studio), you can opt for an aquarium with a capacity of about 20 liters, but no less.
- It is important that the height of the dwelling matches its width. Such a stroke guarantees a sufficient area of contact of air with water. The liquid component will be filled with oxygen, which will ensure the full existence of plants and fish.
- After choosing and buying the appropriate capacity, you need to take care of its installation. It is worth remembering forever that the aquarium should never be placed on the windowsill, while the place should be located near natural light, that is, by the window.
- In cases where the selected surface is unstable (sways, does not have thick legs, etc.), correct this mistake. Use a building level to level the table / shelf so that the aquarium is firmly installed.
Important!It is strictly forbidden to lift or move a liquid-filled tank on the surface. For this reason, think about choosing a suitable location well in advance of the moment of water infusion.
Stage number 2. Aquarium cleaning
- After acquiring and choosing a place to install the house, proceed to clean the aquarium. This stage is very important, it should not be neglected, approach the process responsibly.
- Place a soft towel in the bathtub or shower stall, and place an aquarium on it. Rinse the container with running water at room temperature, avoid sudden changes in liquid with glass.
- Prepare a cleaning solution: grate a third of the bar of laundry or tar soap, pour cool boiling water over it, bring the composition to homogeneity. Cool, then pour into the cavity of the container.
- Using a foam sponge, wipe the walls, bottom, corners. Optionally, you can do without a solution. To do this, lather a cloth, process the dwelling inside and out.
- Rinse the aquarium with water to remove soap particles. Moisten a sponge and walls with plenty of water, pour in baking soda so that the glass is completely covered. Leave the mixture for a quarter of an hour, then proceed to cleaning.
- Wipe the cavity well, wash it several times. Fill the aquarium with water, departing from the edges by 10-15 cm., Leave for 2 days. At the end of the period, pour out water, repeat the last cleaning step with soda and soak again. Such manipulations will help to remove the remains of paint and silicone, which processed the corners.
Stage number 3. Flushing and placement of soil
- The best option for aquarium soil is considered to be sand from a shallow river. In cases where there is no opportunity to lay the foundation of this kind, take any sand. The main thing is to rinse it thoroughly, removing the remaining clay.
- To properly clean the soil, pour it into a deep bucket or basin, then open the tap for maximum power.After the water becomes clear, complete the procedure. You can facilitate the work by washing the soil step by step in small parts. At the same time, it must be stirred with a wooden spatula or spoon.
- After washing, check the soil for cleaning: pour water into a container with sand, wait 10 minutes. After that, stir the composition, evaluate the result. In the presence of turbidity, washing should be continued.
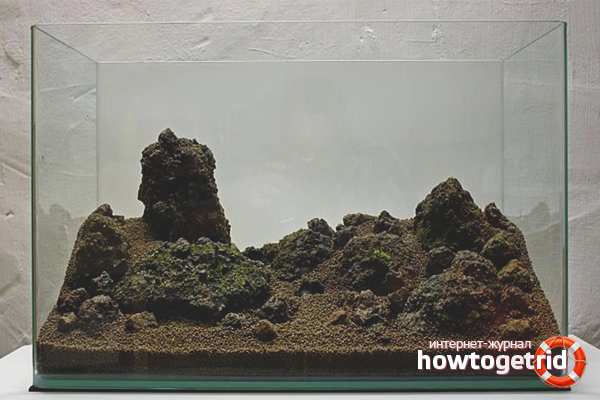
- Proceed with the placement of the soil. Put it on the bottom of the aquarium so that the tank is 4-6 cm full. Make a bias towards the front wall, creating a “marine” effect. If desired, arrange pebbles, decorative driftwood, clay houses, etc.
- Do not place decorations close to glass to prevent accidental damage. Make sure that there are no stones with sharp edges in the aquarium, otherwise the fish may get hurt.
Stage number 4. Filling with water, installation of devices
- Pour pre-settled water into a clean bucket, take a garden hose and lower one edge. Next, make a suction motion “inward” so that water begins to flow out of the tube.
- Attach the second edge to the wall of the aquarium, a similar move will help avoid clouding of the soil. Raise a bucket of water above the house so that the liquid drains faster.
- There is another option for filling the aquarium with water. To make it real, put a plate on the ground, direct a small stream of purified water onto it, use a watering can.
- Install the filter by attaching it to the suction cups on the tank wall. Make sure that the device is working, then adjust the lighting. You can attach a daylight or a special aquarium lamp above the tank so that the light falls from above.
- Cover the fish house with a glass plate that protects the aquarium from dust and foreign objects. Wait 1 week, after this period the house is ready to move in.
It is easy to prepare the aquarium for colonization with fish, if you act in stages. To properly maintain them, it is necessary to prepare a home with all the requirements. Choose a suitable container, clean it, fill it with river soil. Fill with water, install the filter, lamp and protective glass. After a certain period, run the fish, monitor their health.
Video: what you need to know to start an aquarium


Submit