The content of the article
The diffuser is a nozzle that allows you to simultaneously dry and style your hair. In addition, the device massages the scalp, which leads to accelerated blood circulation and strengthen the follicles. Also, the nozzle does not injure hair, despite working with high temperatures. In skilled hands, the diffuser is able to work miracles, so it makes sense to learn how to use it correctly. Consider the main points in order, highlight the popular styling options, give practical tips.
Diffuser for hairdryer: types
- The diffuser is classic. In most cases, this type of nozzle comes complete with a hairdryer. The device looks like a semicircular sphere into which plastic “fingers” are inserted. The spikes have smoothed circles at the end, which do not injure the scalp during the drying process. Such a diffuser structure evenly distributes the air flow and partially cools it, without exposing the hair to high temperatures.
- Diffuser for long hair. A nozzle of this kind is used by girls with a thick mop length from the shoulder blades. The device differs from the classical diffuser only in the material from which the “fingers” are made. The hemisphere is made of plastic, and the inserted spikes are made of silicone. In the process of styling with a classic diffuser, hair is often confused, rubber spikes prevent such consequences due to its flexibility.
- Volume diffuser. Unlike the classic (standard) fixture, the volume nozzle has longer spikes. In the "fingers" also made holes for the exit of air. A construction of this kind acts directly on the roots, raising the hair and giving it volume. The use of a volume diffuser helps to dry hair several times faster due to the increased air flow.
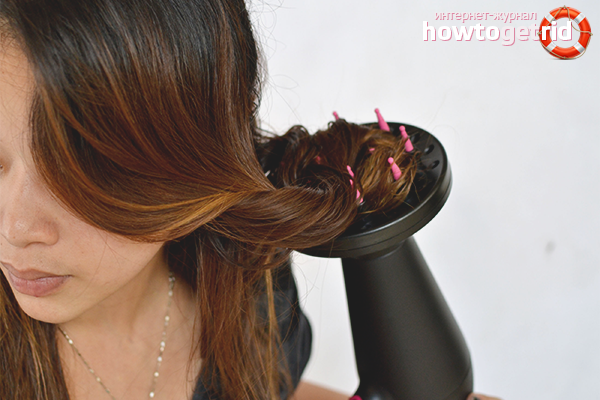
- Curling Diffuser. The hemisphere of the nozzle does not need long spikes, as strands wrap around the “fingers” during laying. Needles with rounded tips are inserted into the base of the nozzle perpendicular to the plane. Moreover, the number of spikes is much smaller than in devices of other types. This design prevents hair tangling and helps to create a uniform curl, as during styling the diffuser must always be turned.
- Diffuser for thin hair. Marketers have developed a completely new device that does not solve the real problem. The nozzle only visually makes the hair thicker, without contributing to the densification of their structure. The diffuser is made in the shape of a circle, while its middle has a recess. From the nozzle side they resemble a bowl with spikes of different lengths. The design prevents the hair from drying out because it acts from a certain distance. Such a move does not injure the skin and thin strands.
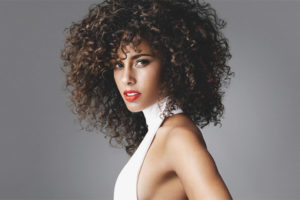
Wavy curls with a diffuser
To create a styling, a curling diffuser is required, in which the spikes are spaced apart. In this case, the "fingers" should not be too long, otherwise the hair will become tangled. In addition, prepare stylers (medium fixation varnish and foam for styling), hairdresser clips, massage brush.
- To start the procedure, wash your hair with shampoo, use a light balm rinse that does not make strands heavier. Dry the curls with a towel, spread the foam in the palm of your hand and apply on the hair. Mousse the root area well.
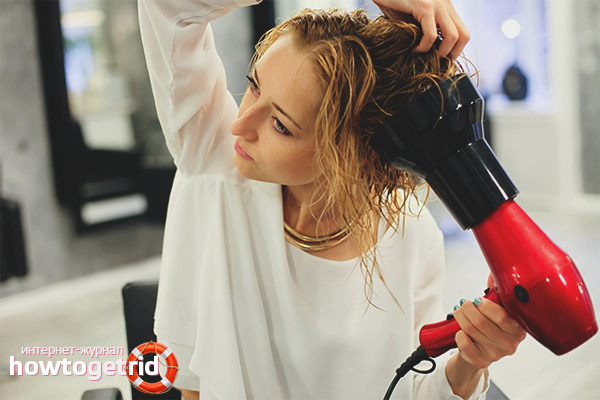
- Install a diffuser on the hair dryer, turn on the device for medium airflow. Lean slightly to the left side, hold the device vertically from the bottom (from the side of the left ear).When the spikes abut against the scalp, make sure that the curls cover the nozzle from above.
- Start drying your hair by rotating the brush counterclockwise. At the same time, try not to tear the device from your scalp. Do not twist the diffuser in different directions, stick to one direction. When the first section is finished, dry the right side in the same way.
- Then move the device over the entire surface of the head, giving styling to other wet strands. To make drying easier, use hairdressing clips when processing the lower rows of hair.
- After all the manipulations, tilt your head down, shake the curls slightly. Put your fingers into the hair, lift them at the roots, spray medium fixation varnish on the surface of the head.
- If you wish, you can create a “wet” effect. To do this, spread a light gel over the hair dried by the diffuser, begin to compress the strands into a fist. When they take shape, sprinkle the hair with varnish.
- If you want to dry your short hair, rotate the diffuser head alternately counterclockwise and along it. This type of drying will allow you to achieve a cute creative mess on your hair. Kopna will look very light and fluffy.
Volume creation with a diffuser
The nozzle is used to add volume to heavy hair. There is no need to use brushing, so damage to the mop is minimal. Prepare a comb with large and sparse teeth in advance. You will also need a crab for hair clamping, medium fixation varnish, styling mousse. Prepare an appropriate diffuser for volume. If this is not the case, use the classic nozzle.
- Wash your hair, dry your hair with a towel. Spread the styling foam on your palms, rub it to get a thin layer. Run your fingers into the heap, treat the entire length of the hair. Then apply mousse separately to the roots and scalp.
- Use the comb to divide the hair into upper and lower sections. Start processing from the bottom, pin the top with clamps. First, bring the diffuser to the back of the head, turn on the hair dryer, move the nozzle up and down, left and right. Exert your hands, giving the hair volume at the roots.
- If possible, dry your hair with your head tilted down. Dry the right and upper sides of the lower section in the same way. When the volume is reached, wait 3 minutes for the locks to cool. Then loosen the upper part, repeat the previous manipulations, starting from the back of the head.
- Try to hold wet curls so that they do not press on already dried locks. After drying, turn on a cold blower on the hairdryer (the “snowflake” button), work through the entire mop without dividing it with a part. As in the previous case, start processing from the back of the head.
- After styling, set the hair dryer aside, tilt your head and shake your hair. Sprinkle the hair with varnish, spraying it on the roots and surface to the middle of the length (do not touch the tips). When the fixative has dried, use your fingertips to lift the strands near the scalp.
How to straighten hair with a diffuser
Paradoxical as it may sound, long curly hair can be straightened with a diffuser. In this case, there is no need to use a tightener, as a result, the strands are not injured too much. A standard diffuser is suitable for straightening.
- Rinse hair with shampoo, dry with a towel. Evenly spread the foam for styling, comb with a wide comb. Make a straight classic parting, lower your head down.
- Bring the hair dryer to the scalp, turn it around so that the teeth look down. Turn on medium airflow, evenly dry the strands, moving from the roots to the tips.
- Repeat the manipulations again and again, combing the strands with the diffuser spikes. Bend the ends so that they do not fluff. After drying your hair, comb the curls. Distribute the fixing agent.
- Similarly, you can use any nozzle with long and frequent spikes. The main thing is always direct the air stream in one direction so that the hair does not tangled.
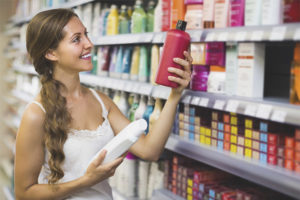
- For convenience, after washing your hair, spray the curls with a spray that is designed to facilitate combing. The Pantin, Sjoss, Glis-Kur, Elsev firms have proved themselves to be excellent.
It is easy to use a diffuser if you have knowledge regarding the available nozzles and their purpose. Create seductive waves on medium hair, lay short strands with cute mess. Straighten long curls with a classic fixture, create a volume with a nozzle designed for these purposes.
Video: laying on the diffuser

Submit