The content of the article
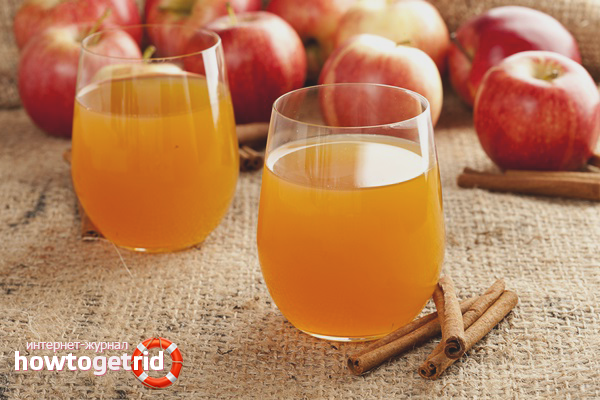
Apple juice is considered to be a storehouse of vitamins. Thanks to mineral elements, the product strengthens the immune system, fights colds, and improves vitality. For this reason, experienced housewives want to preserve the juice in order to be able to enjoy it in the winter. We have collected for you a golden collection of the most delicious recipes that can easily be translated into reality on your own. Consider the important aspects in order.
How to squeeze juice from apples
For the preparation of juice, only sweet varieties of apples are used; in some cases, distillation from fruits with sourness is allowed. The second option involves adding granulated sugar, which can cause heartburn.
Give preference to the following grades: Simirenko, Antonovka, Anis, Grushovka, Golden. Recipes allow mixing different types of apples, it all depends on personal preferences. These varieties are optimally suitable for distillation, as they are moderately sweet, but at the same time they have a share of acidity.
After choosing the fruit you need to sort out. It is important to understand that only healthy apples without a wormhole are used for juice. Each fruit is thoroughly washed with a foam sponge. If store products are used for pasture, baking soda is used to remove wax and possible chemicals.
Then the apples are laid out on a flat surface, wrapped in a towel. After that, they are placed on a paper towel until the moisture evaporates completely. When the fruits dry, the core is cut out. Further, the cooking process goes according to the instructions for the juicer. Fruits are pre-chopped with a knife or sent to the device as a whole.
Apple Juice Technology
- Place apples in a sink, wash each fruit under warm water, and use baking soda if necessary. When all the dirt has been removed, sort out the fruit, cut out the stricken and rotten places, remove the leaves and tails.
- Give preference only to ripe fruits if you do not use a wild game. Spread a cotton towel on the table, lay out fruits to drain water, dry at room temperature.
- Use a thin knife to peel the apples. Try to cut the skin so thin that only the hard, smooth part is removed. It is under it that the accumulation of useful elements that must be preserved is concentrated.
- Cut out the core, remove the seeds and substrates, chop the fruit into cubes of equal size. The size of the pieces directly depends on the characteristics of the juicer. If the appliance mashes large pieces well, do not waste time on trifles, chop apples in half.
- When planning the amount of the final product, proceed from the following indicators: in most cases, when processing 11-12 kg. apples come out about 4-5 liters of juice. It is difficult to say the exact number, because all varieties vary in ripeness and juiciness.
- Pick up a bottle with a neck diameter so that it matches the size of the juicer spout. Such a move will prevent possible contact of the final product with oxygen. If possible, choose ceramic or glass containers rather than plastic ones. The latter option reduces the shelf life of the final product. Also, do not use metal utensils, since it has the property of oxidation.
- Place the selected vessel under the neck, place the pieces of fruit in the cavity of the juicer, turn on the device.Depending on the manufacturer, the rate of dispensing juice varies greatly. Since apples are juicy enough, they are ground faster than, say, carrots. As a rule, 5 minutes of the device’s operation is enough to get 3.5-5 liters of the final product.
- In addition to pressing, the juicer cleans the liquid from the pulp, as in the previous case, the result directly depends on the manufacturer. As practice shows on top of the juice, you can notice a relatively small amount of oilcake. You can either mix it, getting the product with pulp, or strain. In the case of the latter option, use a sieve or make a filter of gauze fabric, folded from several layers.
- As for the cake from the used apples, it is practically of no use, throw it away or use it for your own purposes. At the end of all the manipulations, disassemble the device, wash it thoroughly in the shower, and dry it. Leave it assembled or disassembled until next time.
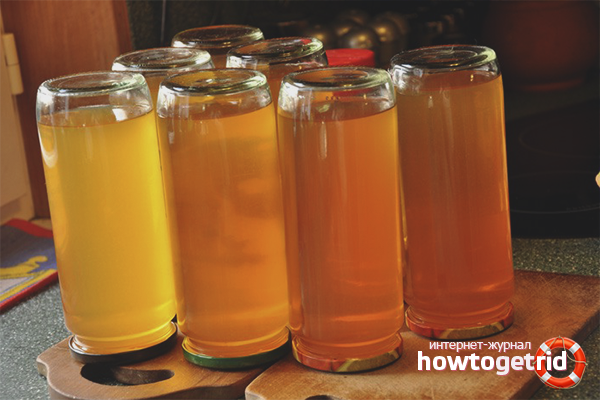
How to preserve apple juice for the winter
There are a sufficient number of ways by which you can prepare apple juice for winter preservation.
First you need to take care of the container into which the product will be poured. Wash it thoroughly with warm water, treat the cavity and external walls with baking soda, pour over boiling water.
You can also sterilize jars by placing them in a pot of water, and then boil thoroughly (about 10-15 minutes). After preparing the dishes, choose the appropriate method of preservation and proceed with the procedure.
Option number 1. Warming up
The preparation technology is as follows: the juice is poured into a wide saucepan with an enamel coating, after which it is placed on the stove and warmed up evenly to 88-98 degrees.
If you do not have a thermometer, a visual inspection will help you to find out about the desired stage. Small bubbles begin to appear on the surface of the liquid, in no case bring the composition to a mass boil.
Next, pasteurized juice is poured into previously cleaned containers and carefully corked. After that, the cans are turned onto the lid and wrapped in warm cloth (plaid, towel, blanket, etc.).
Apple juice can be transferred to a place for long-term storage only after it is infused at room temperature for about 12-14 hours.
Option number 2. Easy boiling
The technique is designed for those cases when there is doubt regarding the quality of the fruits used when squeezing apple juice. For example, you are not sure that you have completely removed the damaged places or cleaned the fruits properly.
Experienced juice makers do not recommend boiling juice for a long time, but heat treatment over high heat for 5 minutes is acceptable. Of course, with this method of pasteurization, most of the useful elements will lose their properties, but the taste and overall impression of using the product will remain unchanged.
Pour the juice into a thick-walled pan, bring to a boil, and note the time. After the specified period (5-7 minutes), pour the product into clean (sterile) cans, cork, turn it upside down, and wrap it with a warm cloth.
The cooling time at room temperature is about 12 hours, after this time the jar needs to be turned over and put in a dark place (cellar, basement, closet, etc.).
Option number 3. Closed pasteurization
This method is good in that the juice boils after it is moved to a jar without preheating. To properly carry out the procedure, prepare a wide pan with high sides, pour juice into glass containers, close the lid, but do not roll it up.
Put the jar in the pan, add warm water, turn on the stove. Stew on medium heat until the first bubbles begin to appear. Make sure that the level of poured water reaches only the shoulders of the container, otherwise it may burst.Next, cover the pan with a lid, bring the juice to a temperature of 85 degrees, not more.
After this period, reduce the heat to a minimum mark, boil a jar of juice for 20-30 minutes, depending on its size. As soon as the pasteurization process comes to an end, carefully remove the container with gloves, immediately roll it up and wrap it in a blanket. Let the juice cool to room temperature (about 12-15 hours), then take it to a dark room for long-term storage.
Important!After making and pasteurizing the juice, sign each jar. Indicate the date of procurement without fail to violate storage conditions. The exposure time during which the product can be consumed ranges from 22-24 months.
As for adding sugar to the drink, this is a purely individual matter. You can interfere with the bulk composition during the heating phase or be content with the natural taste of apple juice.
Apple and carrot juice
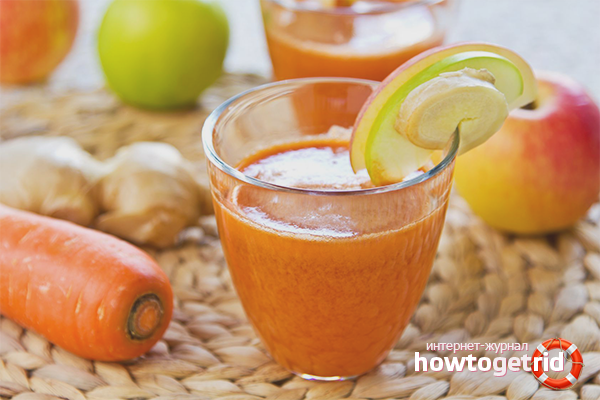
- For the preparation of the drink, it is important to observe the correct proportions. Experienced housewives are advised to mix 2 parts of apple juice with 1 part of carrot juice, while you can add granulated sugar at the rate of 10 g. per 100 ml. final product.
- Wash the carrots, peel it, dry it with paper towels. Chop into small pieces, put in a deep container, pour over boiling water. Wait about 20 minutes.
- Wash and peel the apples, peel them with a knife with a thin blade. Remove the core, chop the fruit into equal sized pieces.
- Mix an apple with carrots, squeeze the juice out of them with a juicer, remove the cake by passing the composition through a sieve. Pasteurize using one of the above methods (“Easy boiling”, “Heating”, “Closed pasteurization”).
- At the stage of heat treatment, add granulated sugar to the juice, wait for the crystals to dissolve. After that pour into banks, cork, cool, clean in a dark place.
Pumpkin juice
- Peel the pumpkin from its hard peel, exclude the fibrous-seed structure from the cavity. Wash the fruit, cut into small pieces, steam them for 10 minutes.
- Wash the apples, remove the peel with a thin knife, remove the core. Cut the fruit into slices of the same size, scald with boiling water.
- Dry the fruits well, send them to a blender or juicer, then exclude the cake with a gauze filter, add ground cinnamon, vanillin and filtered water in a small amount to dilute the composition a little.
- If desired, you can add a little lemon juice to the resulting mixture to give the drink a citrusy touch. Once the juice is obtained, pasteurize it using the “Easy Boiling” method, the only thing is that the cooking time must be increased to half an hour.
- At the end of the manipulations, pour the composition into sterile jars, cork, let cool in a wrapped blanket. Move the container to a place for long-term storage.
It’s easy to make apple juice at home, if you have an idea about the basic processing technologies. Always wash and dry the fruit, separate the cake from the liquid, boil the jars. Consider making apple-pumpkin and apple-carrot juice.
Video: apple juice without a juicer


Submit
Once upon a time I read in the old pre-revolutionary book about apple pressing.and there it was CATEGORALLY forbidden to "stir up" apples !!!! directly dry clean fruits were laid in an oak barrel. he turned upside down and "planted" on "damn" also from oak! in the blended hole. and now the process began from below. the book said that the oxide on the pulp of apples gives a bad color and taste !!! it is necessary to shorten the way the juice into the bottle during the spin process! and core for what ?! NOBODY THINKED ON THE COUNCIL ?! probably hard skin also has juice and it is “not advisable” to mix it with pulp juice! RAVE! and people repeat one after another - in the skin, the substrates of the bones and in the very bones of the juice with a gulkin nose and squeezing it out in a simple manual way is not realistic !!! And here I look and be amazed - APPLES TO FARSHE PROCESS, AND ALREADY SUSPENDED !!! THINKING IS NEEDED, PEOPLE, OVER WHAT YOU DO !!!